Setting up a Kali Linux Installation on VirtualBox
As a technical writer with an interest in programming, I’m always looking for ways to challenge myself in topics related to coding. Much of what goes on in current development takes place in the open source world, where Linux is king, so I’ve begun trying to expand my knowledge of that operating system.
Anyone dispensing advice to the Linux novice will usually suggest starting out with Ubuntu, the most user-friendly Linux flavor, or distro. And I have installed Ubuntu on WSL, a Microsoft Windows-supported framework for Linux. Read more about that here.
But I had become interested in Kali Linux, a more specialized distro favored by hackers and others with an interest in dissecting networks. Because of the risks inherent in putting these tools into the hands of a novice, it is recommended that the new user install Kali on a virtual machine, essentially a sandbox type of environment. Any work done on the virtual machine remains local to the user’s computer.
The preferred virtual machine for the home user is the free application VirtualBox, and that was what I used.
The process took longer and was more complicated than I had initially imagined, so I’m documenting it here, both for my own reference, and as a guide to anyone else who might want to replicate it.
Installing VirtualBox
- Download VirtualBox from http://virtualbox.org by clicking on the large blue download button.
- Install VirtualBox on your computer using the default settings.
Installing Kali Linux on Virtual Box
The easiest type of file to install on VirtualBox is a .vdi file, or virtual image. If you download Kali Linux from the Kali website, you may have trouble locating a .vdi file, since Linux downloads are usually provided as .iso files, for users who want to install the operating system on their computer, rather than run them as virtual images. You can obtain a compatible .vdi file from http://osboxes.org, which provides ready-to-use image files, as follows:
Obtaining Kali Linux
- Navigate to http://osboxes.org/virtualbox-images/
- Scroll down to locate the “Kali Linux” section and expand it by clicking on the bracket at left, then clicking on the link that says “Virtualbox (VDI) image.” This will connect to a Kali Linux-specific page.
- Scroll down again to locate the download links for the latest image file, and click on the correct “Download” button for your computer (32- or 64-bit). Your download should begin.
Installing a VDI on Virtual Box
- Once the image download is complete, copy the image from the Downloads folder to C:\Users\[username]\VirtualBox VMs, the default location for VirtualBox virtual machines.
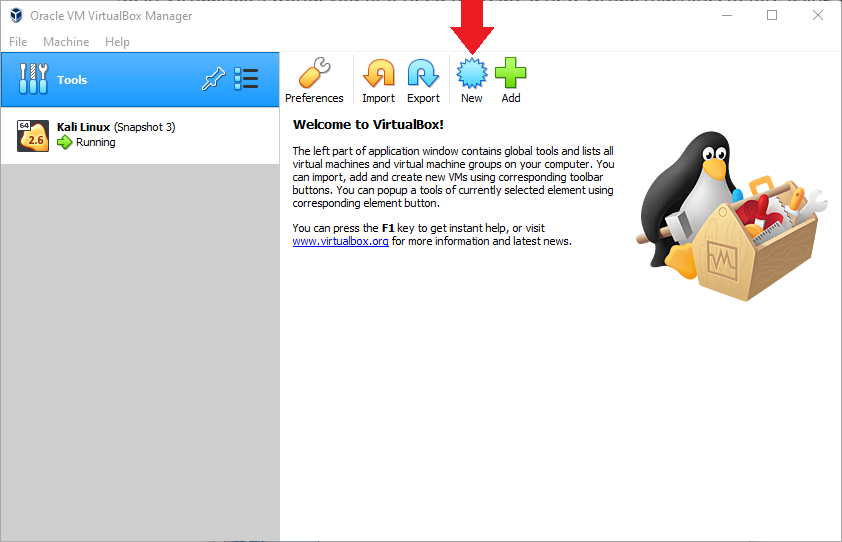
- Start VirtualBox, and create a new virtual machine by clicking on the “New”button in the upper right of the main screen.
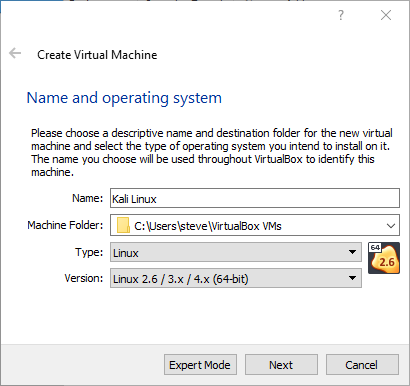
- Fill in the pop-up using the screen below as a model, then click “Next.”
- Accept the defaults for “Memory Size,” then click “Next.”
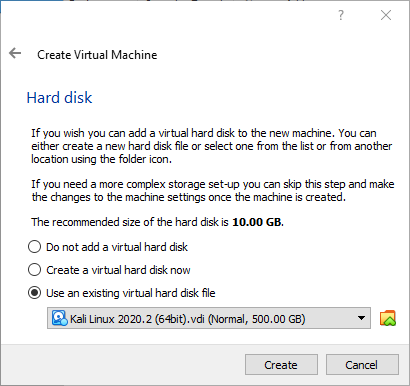
- For “Hard Disk,” select “Use an existing virtual hard disk file,” click on the folder icon at right, navigate to the “VirtualBox VMs” folder, and select the virtual image that you downloaded. Then click “Create.”
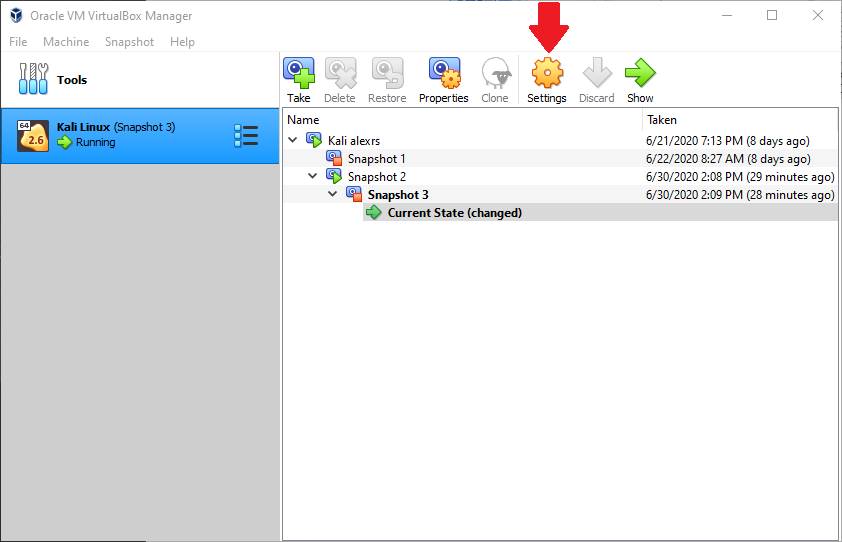
- Before starting the virtual machine, select the newly created Kali Linux virtual machine in the VirtualBox main window, then click the “Settings” button in the top row.
- Click the “Advanced” tab under “General” settings. Then select “Bidirectional” from both the “Shared Clipboards” and “Drag’n’Drop” dropdowns. Finally click “OK.”

NOTE: Selecting the “Bidirectional” option allows you to drag files, and copy and paste between the virtual machine window and your host computer.
Installing Guest Additions on Kali Linux
When you start your Kali Linux virtual machine, you will notice that the guest window, even when set to full screen, does not fill your monitor window. This is because the VirtualBox installation requires some additional files. These are contained on the Guest Additions virtual CD. Proceed to install them as follows.
- Start up your Kali Linux virtual machine.
- Open a terminal window by clicking on the terminal window icon in the upper left.
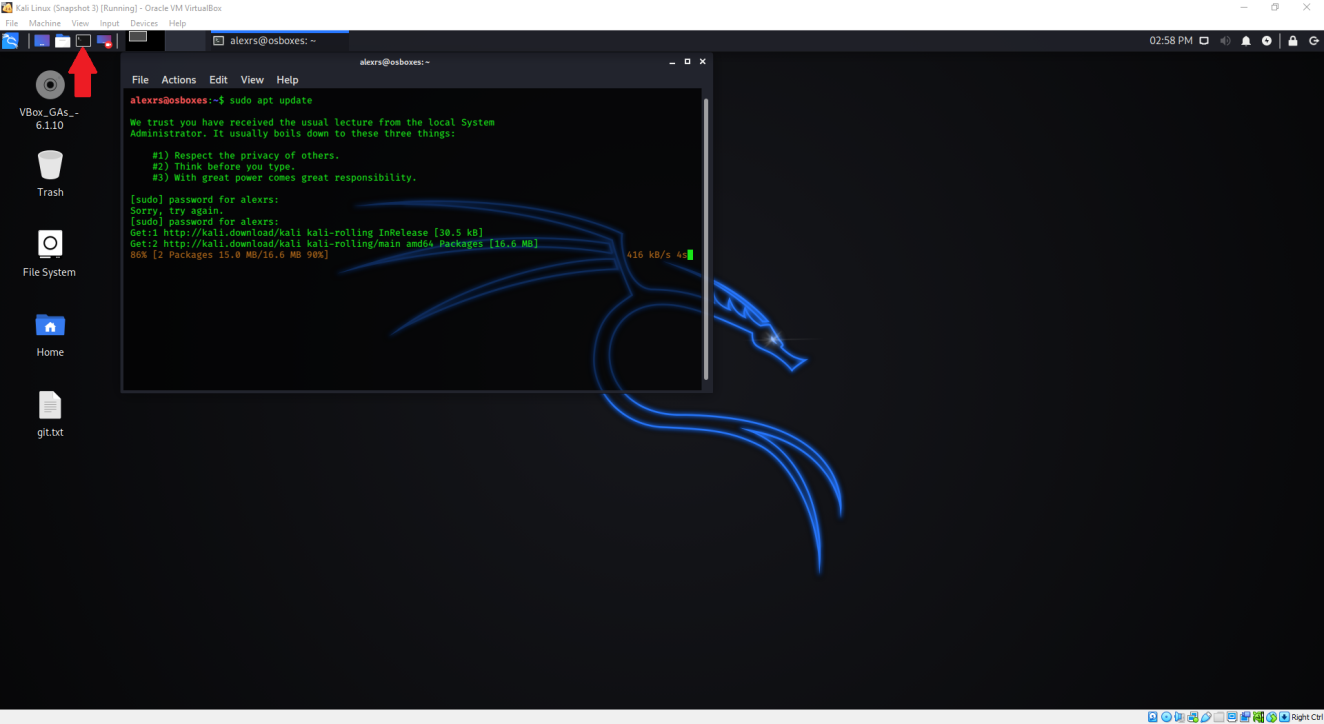
- At the prompt, type:
sudo apt update
You will be prompted for the user password, which, until we create a new user, is “osboxes.org”
The installation will perform a preliminary update.
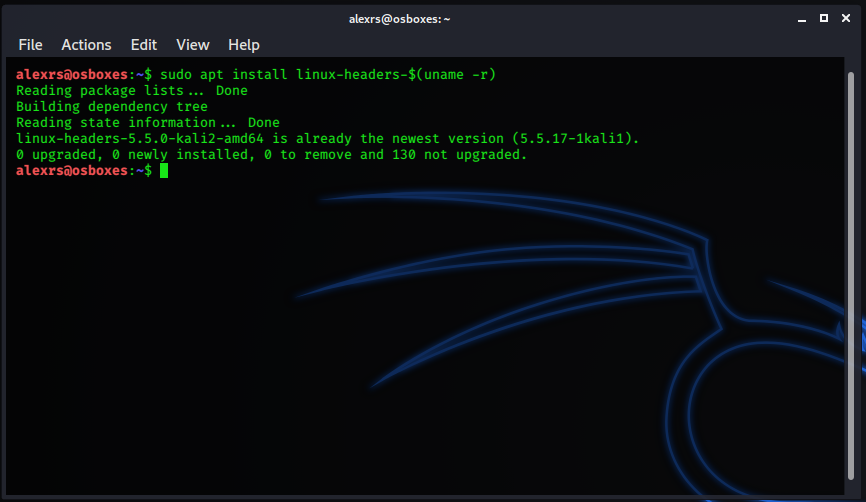
- Then, at the prompt, type:
sudo apt install linux-headers-$(uname -r)
This will install linux headers, another prerequisite.
- From the “Devices” menu, select “Insert Guest Additions CD image.” The virtual CD image will appear on your desktop.

- Double-click on the CD image, to view its contents, then select all the files.
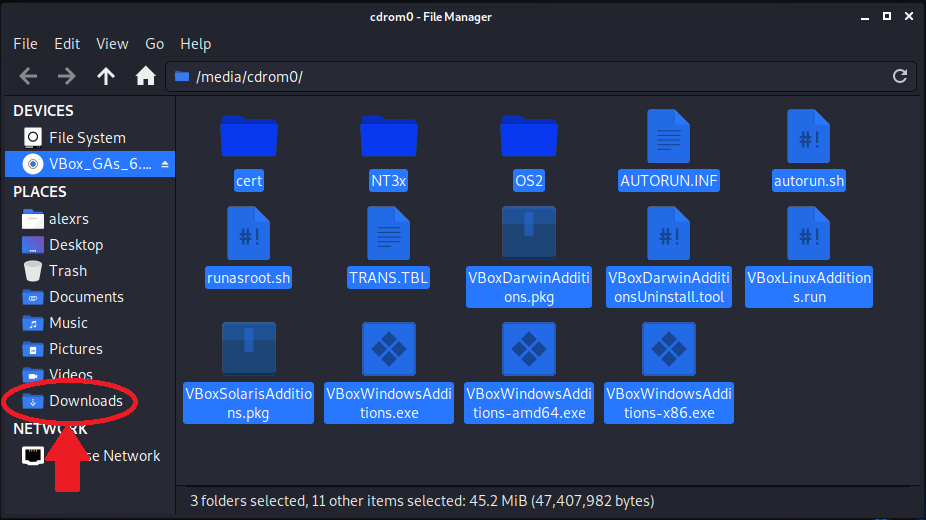
- Press CTRL-C on your keyboard to copy all of the files, then paste them to your Downloads folder.
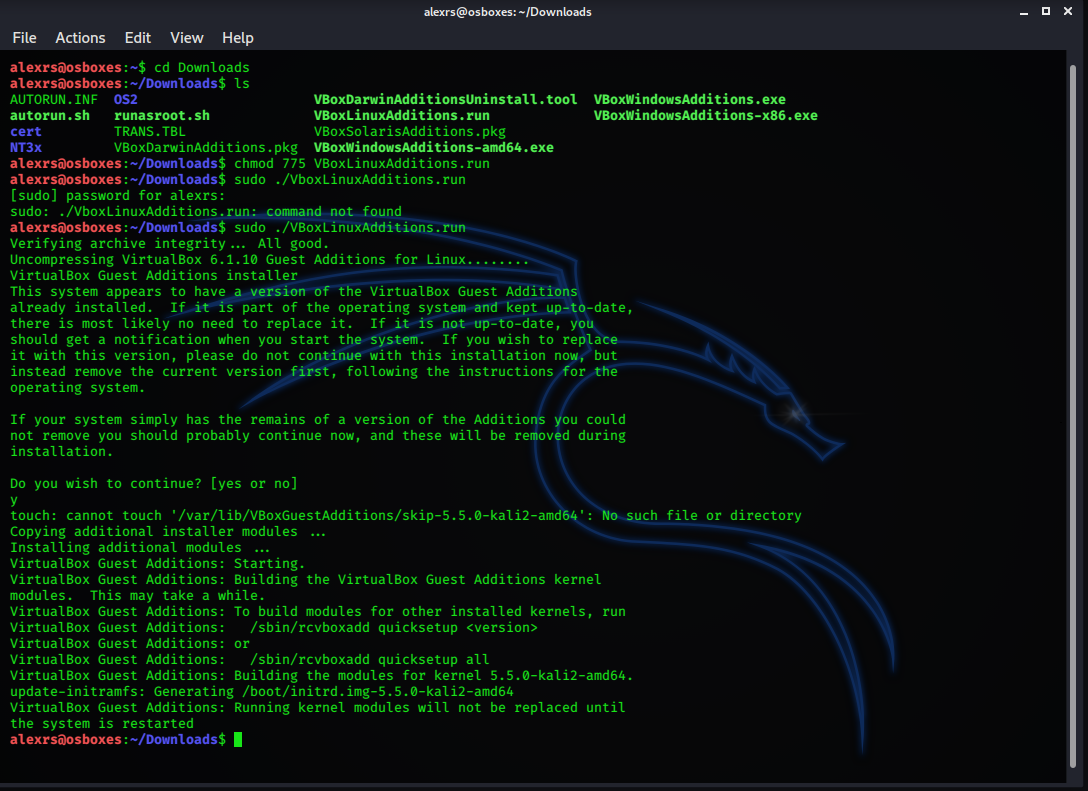
- Open a terminal window, and change directory (type “cd Downloads” at the prompt) to the Downloads folder. Then type “ls” at the prompt to list files, verifying that the contents of the Guest Additions CD have been copied to the Downloads folder.

- Change permissions on the “VBoxLinuxAdditions.run” file, allowing it to be executed, by typing at the prompt:
chmod 755 VBoxLinuxAdditions.run
- At the prompt type:
sudo ./VBoxLinuxAdditions.run
After you enter your password, the system will be updated with the necessary Guest Additions files, and you will be prompted to restart your Kali Linux installation.
Saving a Snapshot on Virtual Box
Before restarting your Kali Linux virtual machine, it is best to save a snapshot of the machine’s current condition. This ensures that changes made, such as the installation of the Guest Additions CD, will be saved for the next startup.
To save a snapshot:
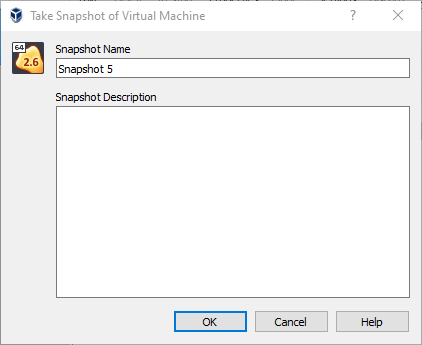
- Before restarting, click on the “Take” button on the top menu bar in VirtualBox.

- In the screen that appears, give the snapshot a name, or leave it at the default. Then click “OK.”
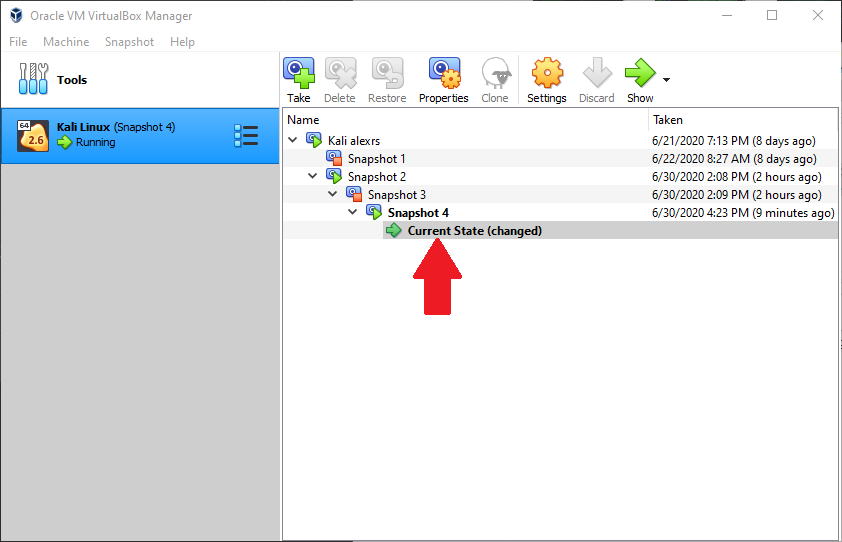
- Restart the Kali Linux virtual machine by selecting the “Current State” of the latest snapshot, then clicking the “Show” button with the green arrow in the VirtualBox menu bar.
Creating a New Administrative User
After installing Kali Linux, you will probably want to create a new sudo user with your own personalized credentials. Do so as follows:
NOTE: You may have to preface the following terminal commands with “sudo” if you are not already logged in as administrator.
- Open a terminal window and type the following at the prompt:
useradd -m [username]
NOTE: The –m flag creates a home directory for the new user.
- Type:
passwd [username]
This will prompt you to enter a password for the user. Enter a password, then retype the password as prompted.
- To add the new user to the administrative group, type:
usermod -a -G sudo [username]
- To specify the ‘bash’ shell for the new user, type:
chsh -s /bin/bash [username]